All guides
Set up destinations
Add, rename, reorder or retire the places students can be sent, each with its own icon.
The Out of Class destinations in the action rail are your school’s own list. They are the most consequential setting in Vero: reports and alert rules use the expected destination selected by staff when they create a pass record.
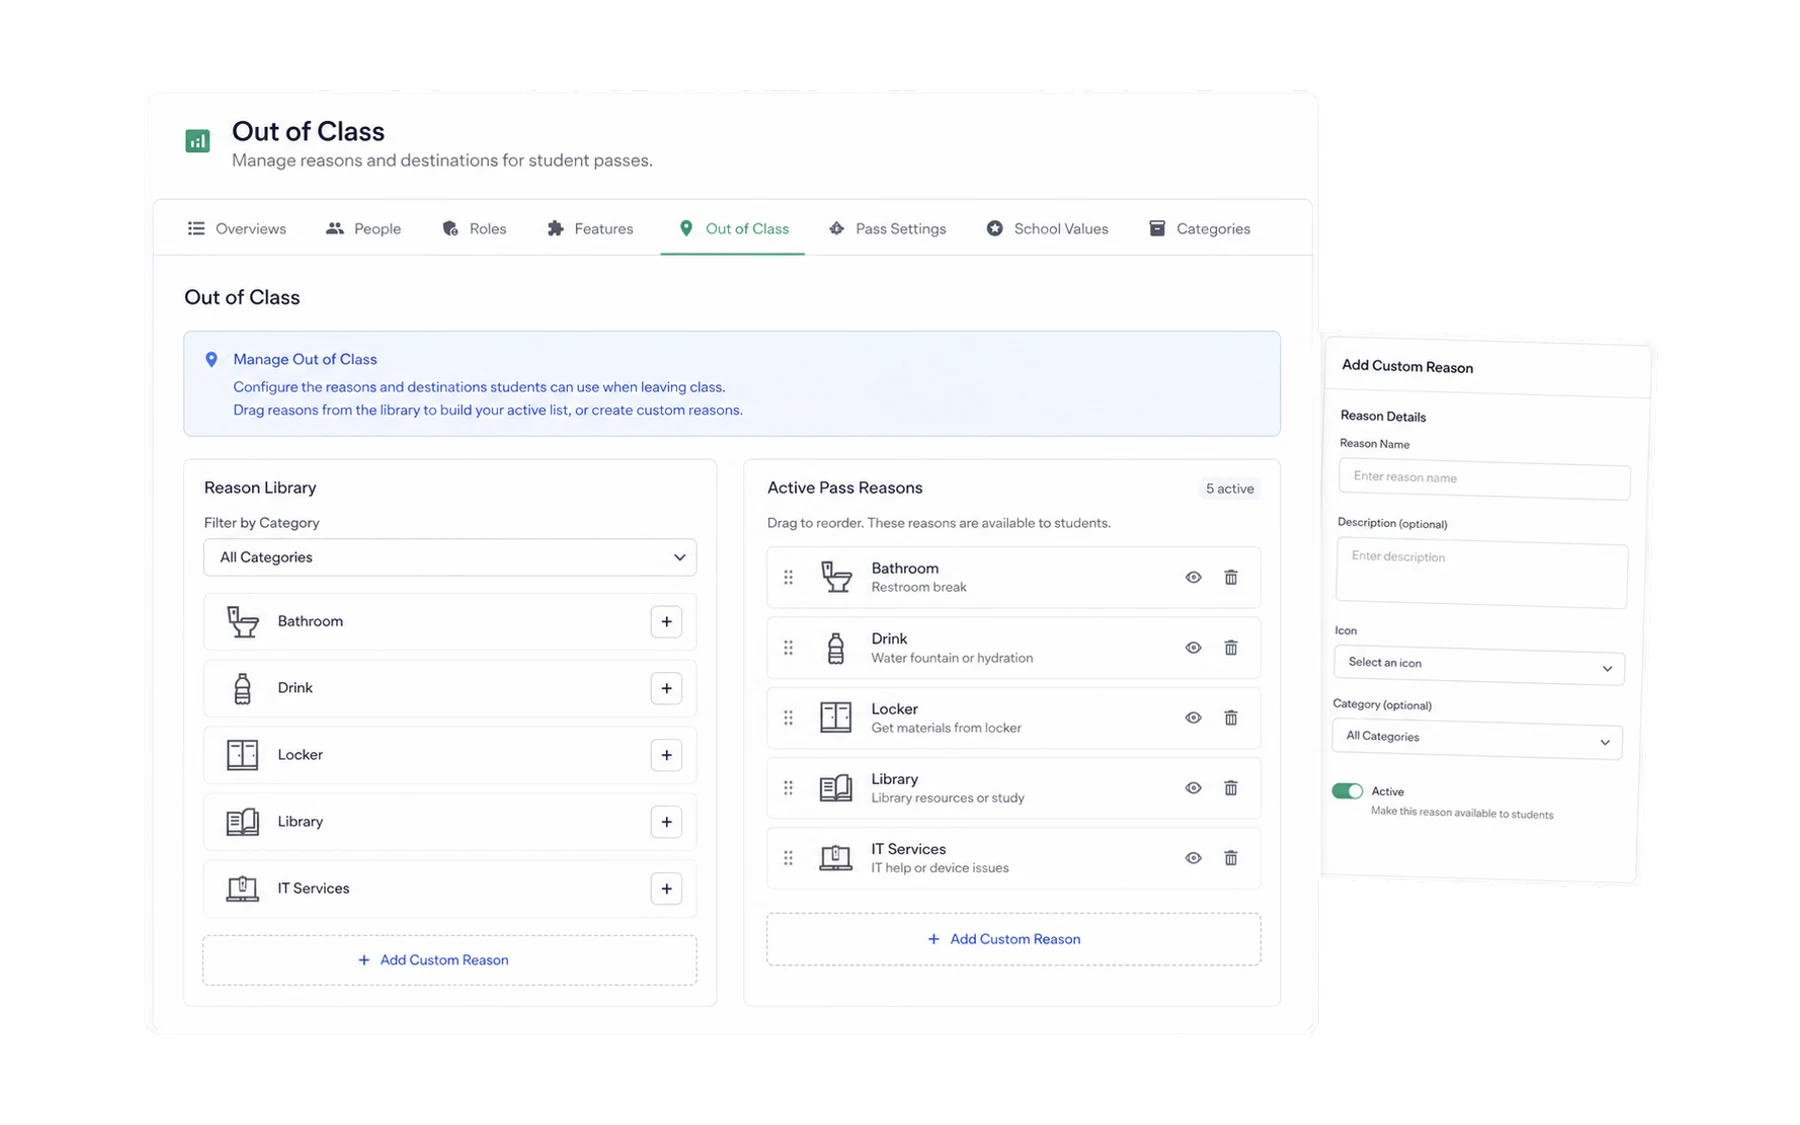
Editing the list
- Open Admin → Out of Class.
- Add a destination, give it a name and pick an icon.
- Order them by frequency. Whatever teachers pick fifty times a day belongs at the top — usually Bathroom.
- Save. The change reaches every staff device immediately, with nothing to refresh.
How many
Five to eight. There is a real trade-off here and it is worth understanding rather than guessing at:
- Too few and everything collapses into “Other”, which tells you nothing later.
- Too many and teachers scroll, hesitate, and pick the first plausible option — so the data is precise and wrong, which is worse than coarse and right.
Wording that works
- Use a neutral expected destination. “Bathroom” and “Library” are clear workflow labels; “Personal” and “Break” can be interpreted differently by staff.
- Use your school’s words. If everyone says “Student Services”, do not label it “Wellbeing”.
- Keep sensitive destinations neutral. A pass reason is visible to staff and on kiosk screens. “Guidance” is fine; a label that discloses why a student is seeing someone is not.
Retiring a destination
Retire rather than delete. It disappears from the teacher’s list while every pass already recorded against it keeps its label — so last term’s reports still make sense.
Where else the list appears
- Kiosk Mode — a screen is assigned destinations from this list.
- Alert rules — a rule can be scoped to specific destinations.
- Encounter Detection — filters by destination.
Which is the real argument for getting this list right in week one.